In my last RipRap article I mentioned taking some fly tying classes at the old Bentley’s Fly Shop. In addition to the Uncased Kinni Caddis, one other fly pattern that was introduced to me was a scud. As my fly tying journey was getting underway, my trout fishing journey was just beginning. In fact, the first trout I ever caught was on an Orange Scud that I tied.
Jumping ahead a couple years, I was lucky enough to be introduced to the Laughing Trout Fly Tying Club. As I settled into a routine of tying with the group on Wednesday evenings, I would hear them mention a fly they called a PPP or sometimes a Potter’s. They would mention the fly, but would never share any details about it. It took a few weeks before any of the members would give me any kind of clue about what this “secret” fly was.
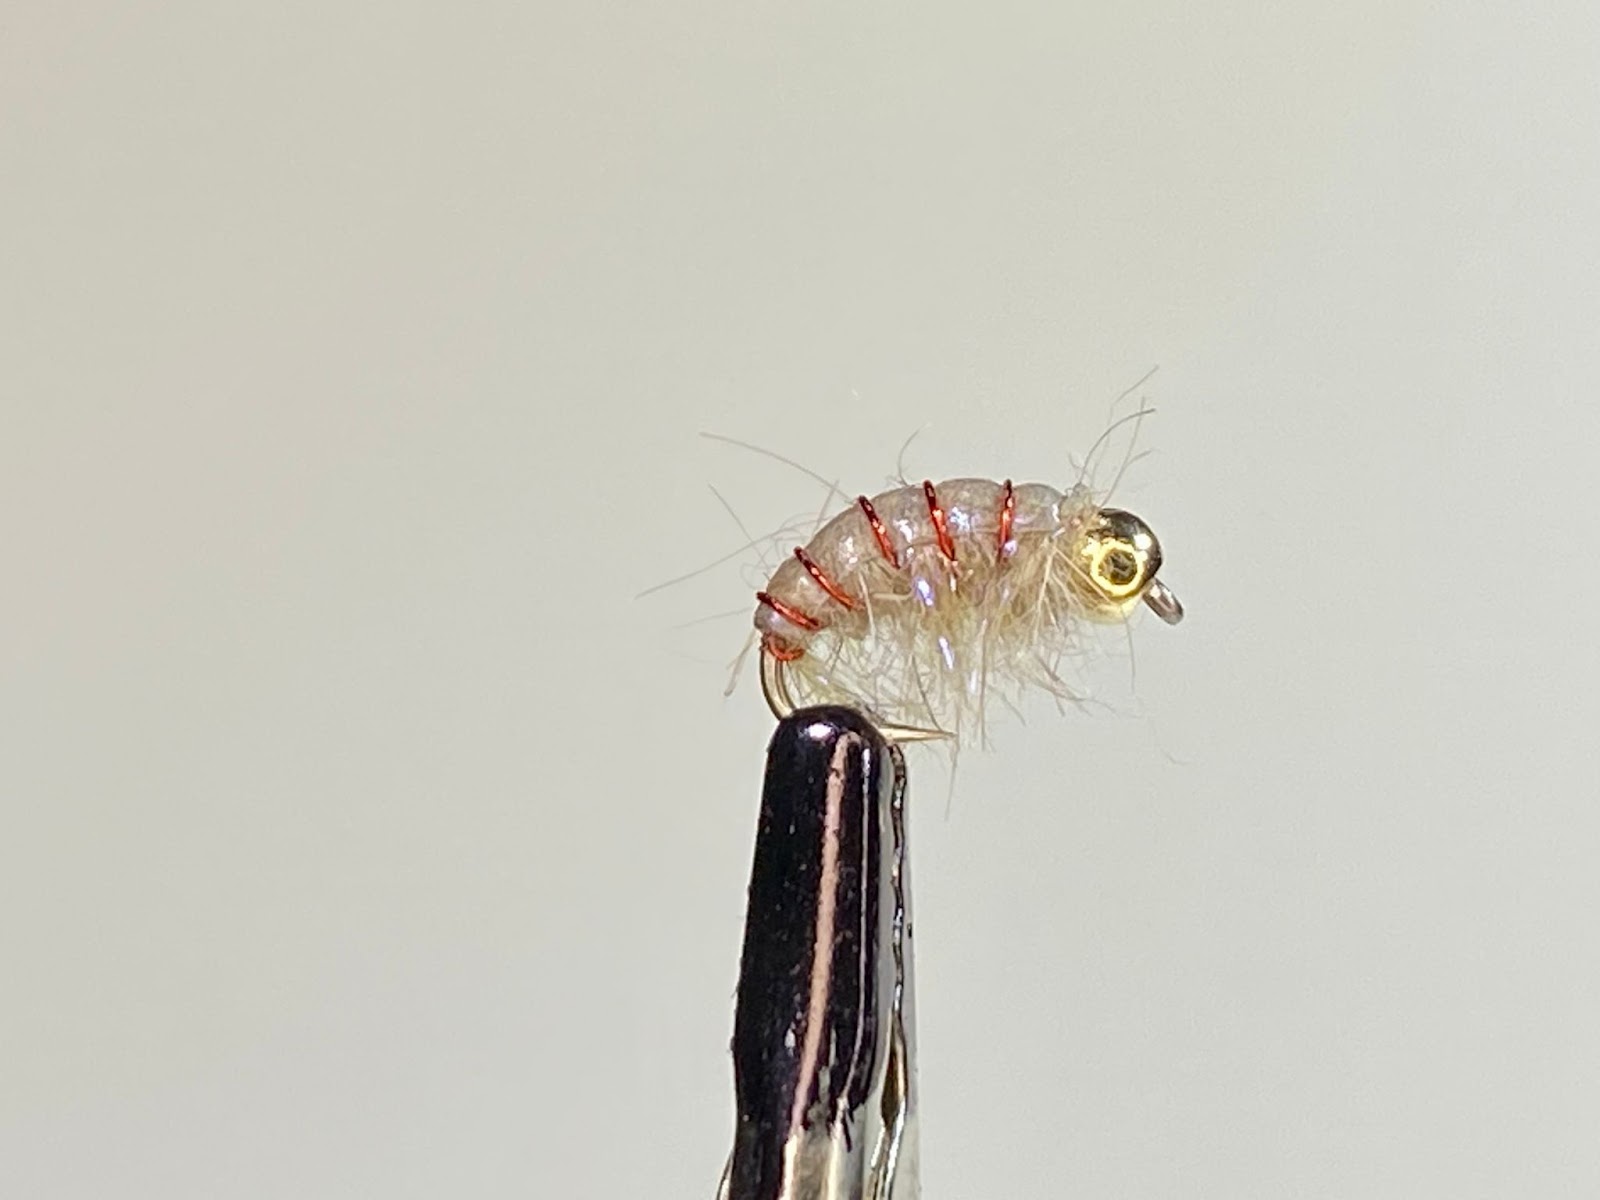
In time, I guess I earned their trust enough to learn that the fly was Potter’s Perfect Pupa. The fly was created by an early member of the group, Dennis Potter. Dennis took a scud-style hook, added a tungsten bead, a length of red wire and black rabbit fur that he tied in with a dubbing loop, and voilà, the Potter’s or PPP was created. The fly took on legendary status on a trip to the Whitewater River by Dennis, Rich Frick and Jim Thomson when it was the only fly that caught fish and that was a group of fishermen that rarely had trouble putting fish in the net.
Some fly-tyers just can’t leave well enough alone (present company included). By the time I joined Laughing Trout, members of the group had put their own spin on the original pattern by changing sizes and dubbing color. One of those variations was a tan Potter’s that was tied with UV Ice Dubbing. I tried tying the fly that way and started catching fish on a regular basis.
When I started to donate fly boxes to Trout Unlimited and other groups, I felt like the fly needed just a little more refinement to look good in a box, so I added a Latex Scud Back. For dubbing I like to mix about half and half tan UV Ice Dubbing and natural rabbit dubbing together in a
coffee grinder (preferably in an appliance dedicated to mixing dubbing so the rabbit fur doesn’t end up in your morning brew).
Hook: Size 12 – 16 Scud Hook
Bead: Gold Tungsten to match hook
Shell: Latex Scud Back
Rib: Red wire, size Brassie
Abdomen: UV Ice Dubbing and Natural Rabbit Fur Dubbing
There are a lot of days on the stream that it seems if you cannot catch a fish on a Potter’s, you might just as well call it a day and go home.
When my fly tying journey started around twenty years ago, my goal was to be able to tie up some panfish and maybe some bass flies to play around with up at our lake cabin in Northern Minnesota. I quickly found out that I really enjoyed wrapping fur and feathers around hooks in order to make a fish think that it looked good enough to eat.
After a year or so of learning to tie flies on my own, I decided that I wanted to move it to a higher level and take a fly tying class. I found a class at Bentley’s Fly Shop when they were still located in Eden Prairie.
The instructor for the class was John Mowery. I really appreciated John’s attention to the small details when tying flies.This was my first introduction to trout flies and trout fishing, so it was all new and fascinating to me.
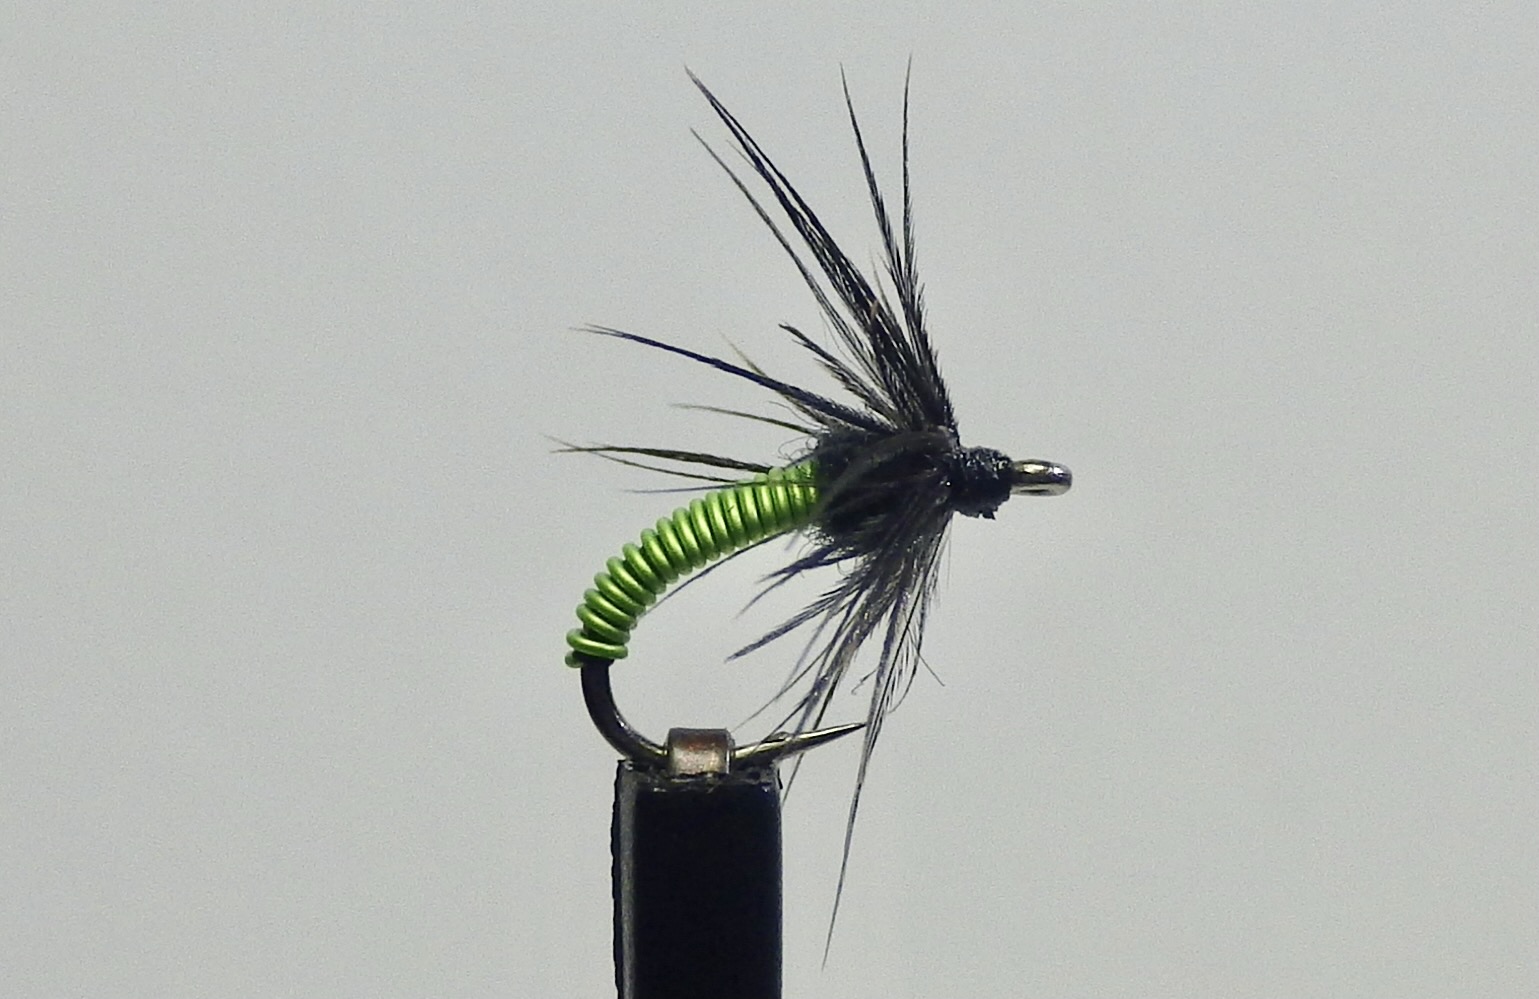
It was at one of these tying classes that John showed us his Un-cased Kinni Caddis. This fly has been a staple in my box since that time and remains my favorite sub-surface caddis fly.
Hook: Size #16 emerger hook
Thread: 14/0 or 8/0 black
Abdomen: Ultra Wire, size Brassie in chartreuse
Thorax: Black Superfine dubbing
Collar: Starling feather
At one of those classes John made a comment about donating some of the flies he tied to Trout Unlimited. A person has to wonder if that comment had an impact on me or not?
If you have any questions or comments, please feel free to reach out to me.
My fly tying journey started almost 20 years ago. I had been playing with a fly rod to catch bass and panfish. I was not a trout fisherman. It was fun to tie up some Wooly Buggers, Clouser Minnows and Panfish Poppers. The more I tied, the more I enjoyed wrapping stuff around a hook to fool fish. After taking some tying classes at a local fly shop that were of course focused on trout flies, I was hooked.
As my good friend Craig always seems to remind me, I tend to be a little old school. I do not always embrace our current technology. When I started tying flies all of the information available to me was either in books or magazines. I am not sure if YouTube existed back then. If it did, I did not know what it was.
One of my go-to print media was Midwest Fly Fishing Magazine that was put out by the late Tom Helgeson. In each one of those editions there would be an article on fly tying by Dennis Potterout of Michigan. I would soak up everything he wrote like a sponge.
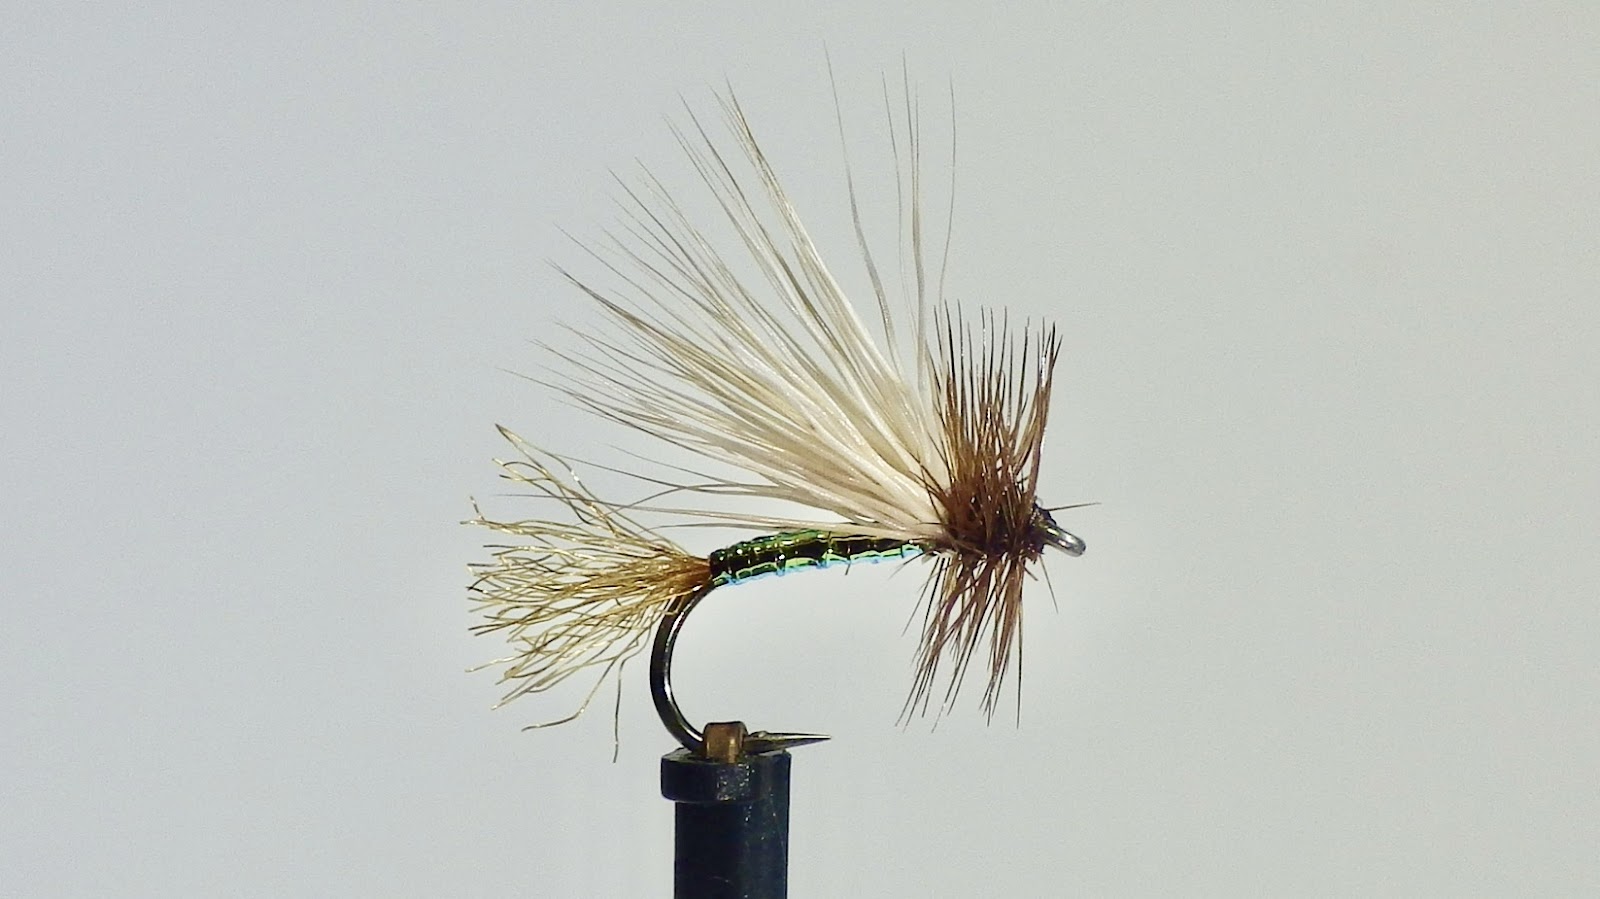
In one of those editions, he featured a pattern called the Opal X-Caddis and he talked about all the success he had with that fly and why you should fill your fly box with them (just like I am about to tell you!).
Based on that article, I tied up a bunch. Of course, since it’s kind of my thing, I had to make some changes to the original pattern. Not everyone agrees, but I always call my changes improvements. That’s how Mr. Potter’s original fly became my Improved Opal X-Caddis. (Thanks to my friend Mike Alwin for the clever name.)
The biggest change I made was to the head of the fly. Mr. Potter would just clip the butt ends of the deer hair wing like you would on a standard Elk Hair Caddis. I refined the head just a little by adding a touch of dubbing and 3 or 4 turns of brown hackle to finish the fly. So now it is improved! I almost always tie the Improved Opal X-Caddis on a size 14 hook, but I do size my hackle down to about a size 18 feather for the head.
Even if you don’t trust my opinion (hard to fathom, isn’t it?), you can believe Dennis Potter: This is a great fly pattern and one that you should have in your fly box this spring.
If you have any questions or comments, I always like to hear from you.
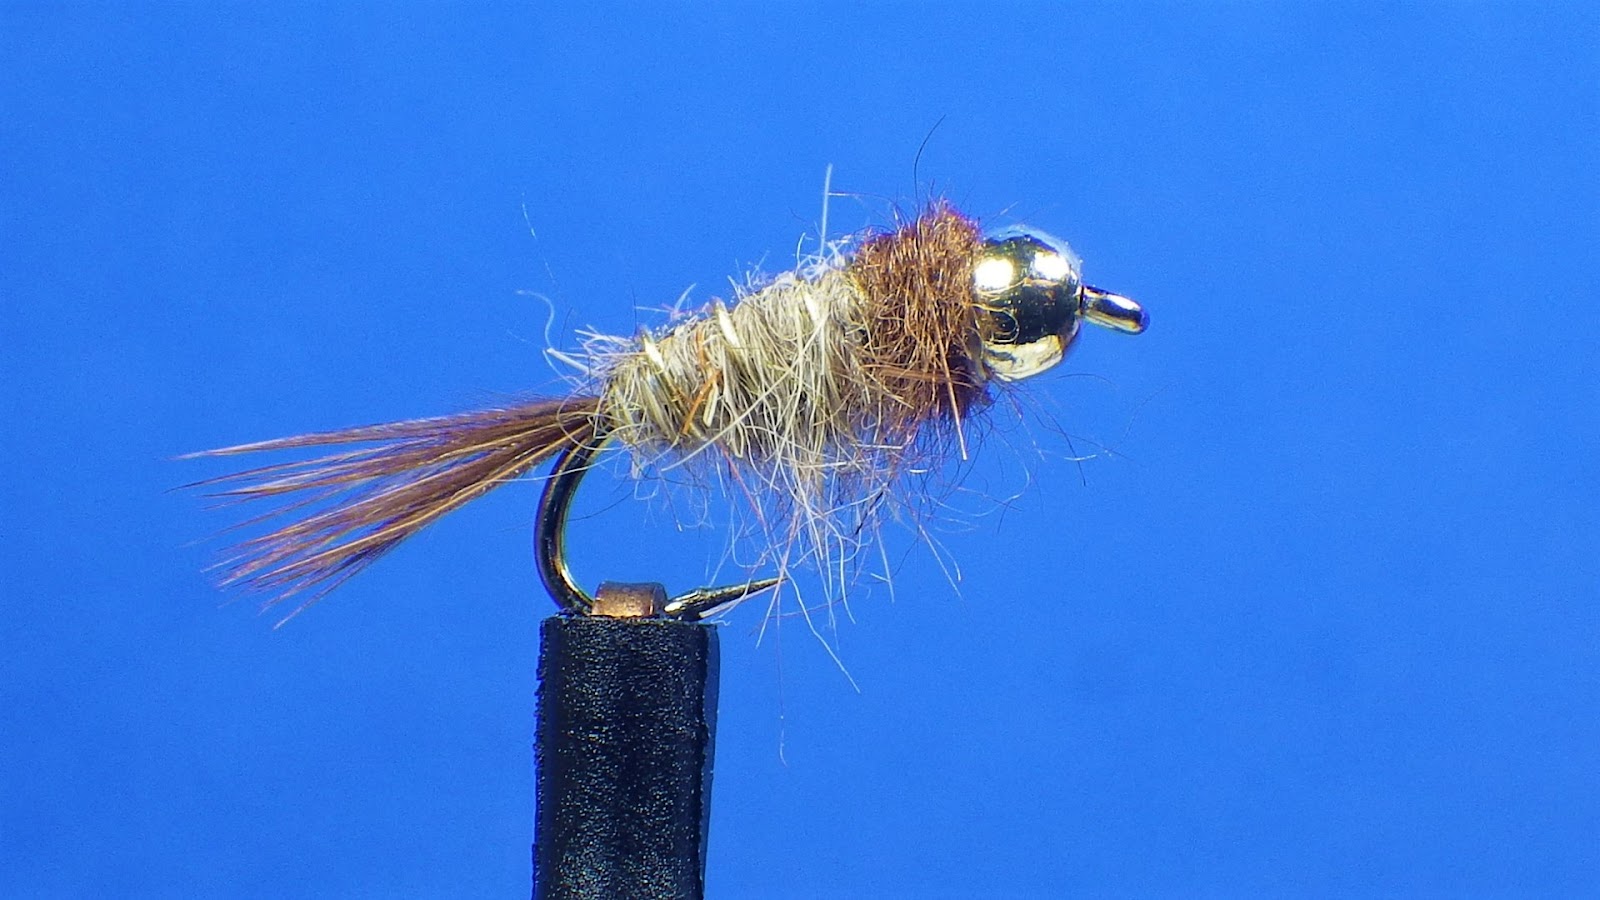
The Gold-Ribbed Hare’s Ear (GRHE) nymph has been a constant in my fly box for many years now. Before I get to that, did you know that I actually started tying trout flies before I started trout fishing? The first trout I ever hooked in the Driftless was on a GRHE. Did you notice that I said hooked and not caught? Not long after that I had a very memorable day fishing on the Missouri River near Craig, Montana with a very simple GRHE.
Now where was I? Oh, yeah: the GRHE has always been in my fly box. I always had a supply of them, tucked safely in the back corner never to see the light of day. They stayed there until a couple years ago when I was on a multi-day fishing trip down in the Driftless with a couple buddies. One day, Jason was having a better day catching than I was. That’s not allowed, so I caught up to him and asked what he was catching them on and he said the GRHE. I dug into my fly box, blew the dust off one of my GRHEs, tied it on and started to catch some fish.
The truth be told, I still do not fish this fly all that much. However, every time I do, I seem to consistently catch fish. Maybe this reminder will encourage me to use them more often.
I like to tie GRHEs on a size 16 1xl nymph hook with a gold tungsten bead. Most of the time I will add a flashback. I think it is a fly that is so versatile that you really cannot tie it wrong.
Do you think that maybe James Ogden and Frederic Halford really knew what they were talking about when they started tying and writing about the Gold-Ribbed Hare’s Ear in England over 150 years ago?
If you have any questions about this fly pattern or any of the flies that I tie, please let me know.
Having recently retired I now have a little more time to reflect back on some of the things I have accomplished in my life. During this time of reflection I have come to the conclusion that the best ideas I ever had, I borrowed from someone else! That is how my favorite fly, the Purple Prince Charming came to be.
Several years ago Fly Tyer Magazine featured a fly pattern called the Prince Charming. I have always been a big fan of the standard Prince Nymph, so this fly caught my eye. As I recall, the original Prince Charming had a stubby marabou tail and an olive tinsel body. It had a wire rib, white goose biots for the wing and also quite a bold thorax with dubbing and several wraps of hackle. After studying the article and the step by step instructions, I tied some up and they looked okay, but I saw the potential for something better.
Since the fly was “just okay”, I borrowed that pattern and asked myself how to make this fly better. First thing to go was the marabou tail, which I replaced with Zelon. Next the abdomen, where the olive tinsel was out and replaced with purple stretchy floss. The wired ribbing and the white biot wings were fine by me. For the thorax, I did away with the dubbing and just made three full turns with standard dry fly hackle. That is how the Purple Prince Charming came About
.
In the past couple years, my Prince Charming family has grown and now includes Red, Olive, Hot Pink, Chartreuse and Copper. I will fish these flies from early spring through the fall. I encourage you to tie some up and give them a try.